|
 |
Aelita Cosplay [Lyoko - Season 4]
| | | Create your own cosplay... Aeltia!
Here, discover the different steps to create a cosplay of season 4 Aelita by its creator, a member of the Group Cosplay project for the 2013 Japan Expo.
Here is a look into this meticulous work. It should be able to help you if you also one day wish to create your own cosplay! | | |
| | | Hello, as I'd already started this cosplay before the idea of the group was created, I don't have any WIP pictures to show you. However, since I've already had a few questions about this costume, I'm going to try and explain a little of how I did it, for those who may need some help.
Sorry in advance for the pavé ^-^'
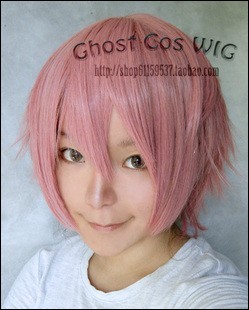
For the wig, I bought it on eBay, for around 10. Here's the image that was presented:
For the pink eyebrows I followed this tutorial (in French)!
I used the same eyeshadow for the eyebrows and the two marks on Aelita's cheeks.
For the earring, I took a clip from a pair I no longer wear. I connected it with iron wire and hot glued it to a pearl, which I painted pink and silver.
The elf ears come from a disguises magazine (they were originally advertised as witch ears xD) and they're worn with make-up liquid latex (the same used for zombie make-up). I covered them in the same foundation I used for my make-up, so that the skin tone more or less matches my own.
All the material used is Lycra (in light pink, dark pink, blue, purple and yellow). I roughly did the suit in Lycra in the shape of my body and then pinned it to myself for sewing (with help for the back part, because it's not really possible to do alone ^-^').
The shoulder pads, skirt and two blue stripes around the stomach were done with transparent plastic sheets. For the blue stripes I painted then on the inside to keep the plastic effect and added them to the suit with Velcro (without which the suit wouldn't be elastic enough to put on).
I glued on the skirt with strips of yellow Lycra and blue Lycra on the belt. The belt buckle was done in pink and purple foam. It closes with plenty of Velcro.
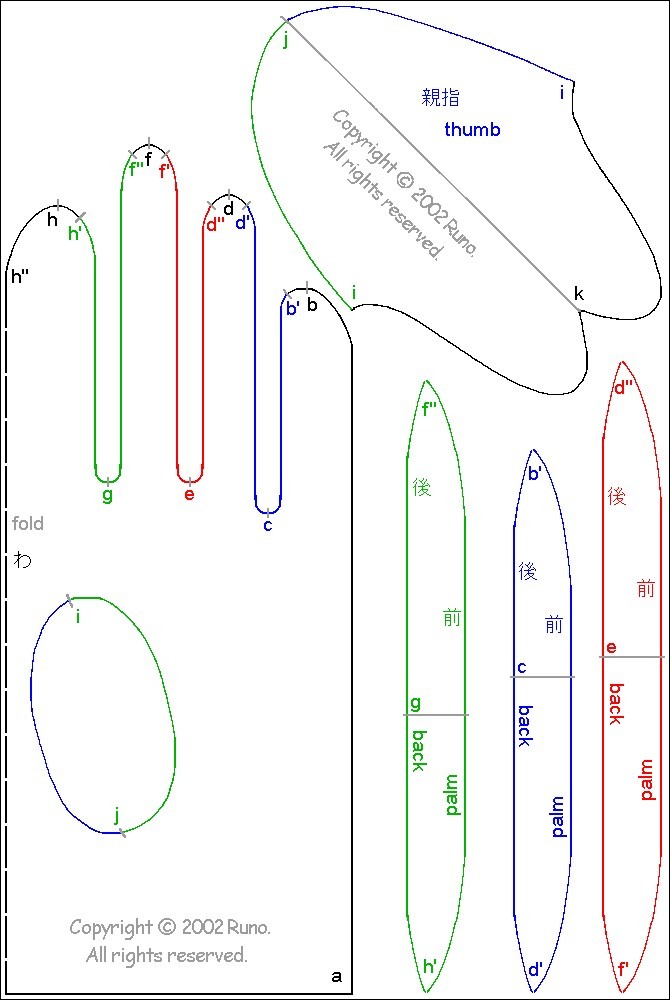
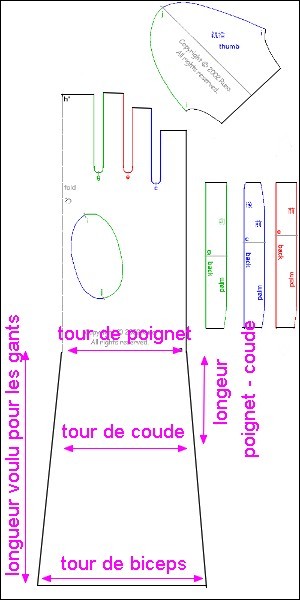
For the "tubes" at the top of the gloves I used this tutorial on Sailor gloves (and the same for the collar). As I didn't have padding, I instead used foam stripes that I cut from a gym mat, that I had at the time.
I then sewed them to the gloves which I made with this pattern (printed on an A4 sheet).
I modified it by removing the fingertips and lengthening the top, a little like this (it's very schematic, don't print what I show here, but the one above, and then change it according to your measurements):
Be careful, even if the Lycra is stretchy, I think that the design is made for smaller hands. On the other hand don't take too large a measurement for your biceps, if not the glove will fall off (you can even reduce it a little bit, as Lycra is stretchy).
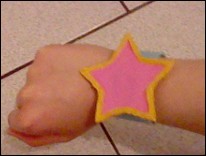
The star watch was made out of foam. The yellow border of the star was embossed with hot glue that I painted (you need to be meticulous to not end up with irregularities). It closes with Velcro.
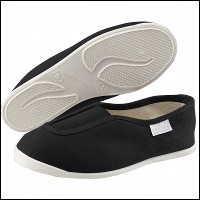
For the shoes, I bought gymnastics shoes at a sports shop:
I sewed them to the feet of the suit (I used a thimble at yet I lost count of how many times I pricked my fingers with the needle doing this). I also painted the edges and soles in purple.
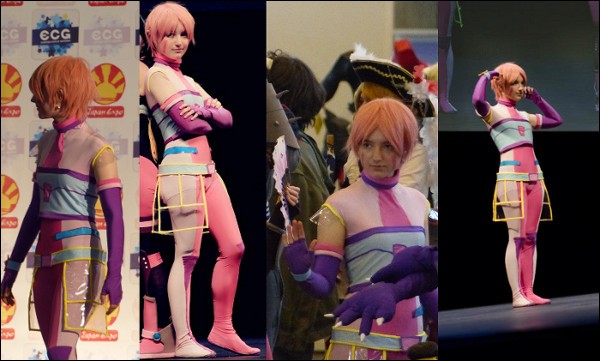
And here's the result:
| | |
|
 |